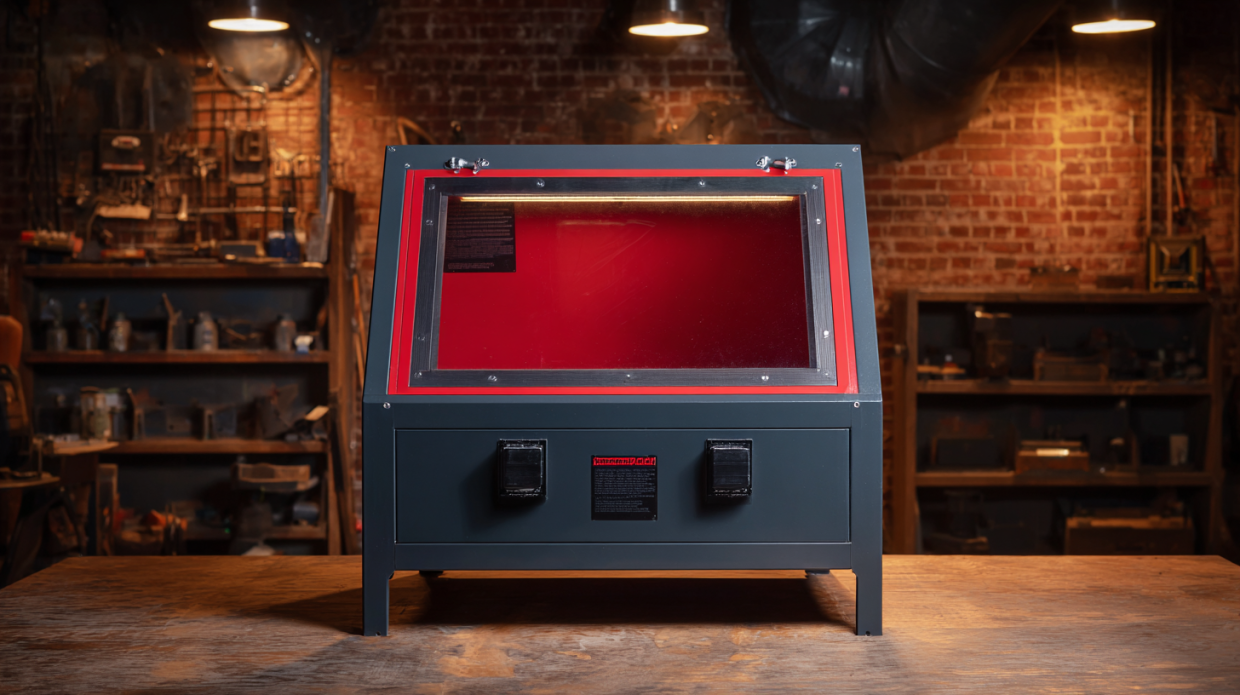

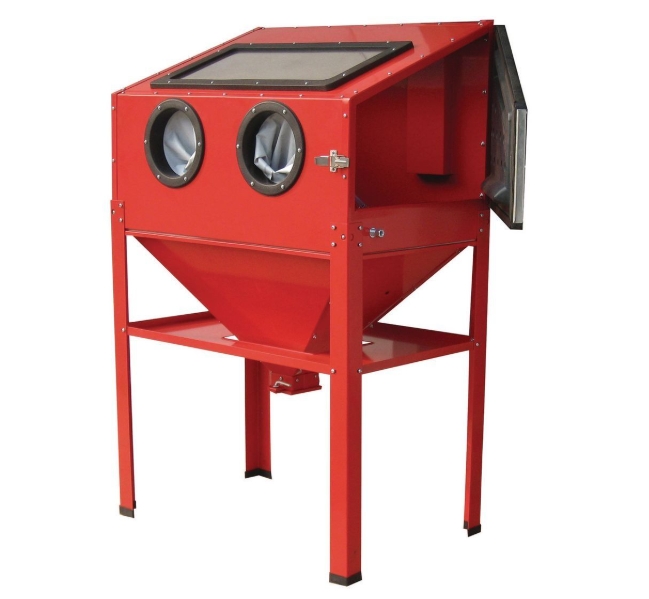
CENTRAL PNEUMATIC 40 lb. Capacity Floor Abrasive Blast Cabinet
- A wide side door opening and large viewing window make this blast cabinet ideal for cleaning automotive parts. This blast cabinet comes equipped with sand blasting gun and ceramic nozzle along with an extra bright light to give you full vision when working. This heavy duty blast cabinet is constructed of 19 gauge steel.
- Includes gun with ceramic nozzle, hose and gloves
- 19 gauge steel construction
- Built-in lighting system
$229.99
When I first started restoring vintage motorcycle parts in my cramped garage workshop, I struggled with removing years of rust and grime using manual methods. Each project took forever, and the results were mediocre at best. That all changed when I discovered the Central Pneumatic Benchtop Blast Cabinet – a game-changer that transformed both my workflow and results. Today, I’m sharing everything I’ve learned from thousands of hours using this versatile tool, from assembly to maintenance and everything in between.
My Journey with the Blast Cabinet Begins
The first time I saw a blast cabinet in action at my buddy Mike’s workshop, I was genuinely amazed. He was cleaning an old carburetor that looked practically new after just minutes inside his cabinet. I knew I needed one, but with limited space and budget, I worried it might not be feasible. That’s when Mike pointed me toward the Central Pneumatic model from Harbor Freight. “Perfect for guys like us,” he said, “who need professional results without dedicating half the garage to equipment.”
After three years of near-weekly use on everything from automotive parts to custom metal art projects, I’ve developed a comprehensive understanding of this tool’s capabilities, limitations, and how to get the absolute most from your investment. If you’re considering adding one to your workshop arsenal, you’ve come to the right place.
Understanding the Central Pneumatic Benchtop Blast Cabinet
Before diving into specifics, let’s clarify what exactly this tool is and how it works. The Central Pneumatic Benchtop Blast Cabinet is essentially a contained environment that allows you to direct abrasive media at parts you want to clean or finish, without making a mess or creating dangerous dust clouds.
How Does It Work?
The concept is brilliantly simple but incredibly effective. The cabinet consists of a sealed metal box with a viewing window, built-in lighting, side-mounted gloves for your hands, and a trigger-operated blasting gun connected to your air compressor.
When you pull the trigger, compressed air forces abrasive media (like sand, glass beads, or aluminum oxide) through the gun’s nozzle, creating a high-velocity stream that impacts your workpiece. This process strips away rust, paint, scale, and other unwanted materials without damaging the underlying surface (if you use the right media and pressure).
The beauty of the system is that all the dust and spent media stay contained within the cabinet, falling to the bottom where they can be recycled through the system or discarded. This means no mess in your workshop and no dangerous particulates in your lungs – a substantial upgrade from open-air blasting or chemical stripping methods.
Price Point: Is It Worth the Investment?
One of the most attractive aspects of the Central Pneumatic model is its affordability. While industrial blast cabinets can cost thousands, the Central Pneumatic Benchtop Blast Cabinet typically retails between $189-$229 depending on sales and promotions at Harbor Freight. I purchased mine during one of their frequent coupon promotions and paid just $179.
For perspective, I had previously paid a local shop $75 to blast clean a set of motorcycle wheels. After completing just three similar projects, my cabinet had already paid for itself. Now, three years later, I’ve saved thousands while gaining the convenience of on-demand access.
Size, Space Requirements, and Workshop Compatibility
Dimensions and Weight
The Central Pneumatic cabinet measures approximately 24″ wide, 19″ deep, and 27.5″ high. These dimensions make it perfect for placement on a sturdy workbench or dedicated stand. The cabinet weighs about 60 pounds empty, making it substantial enough to stay put during operation but still manageable for initial setup.
Is It Right for Small Workshops?
This is where the Central Pneumatic model truly shines. The benchtop design is ideal for space-constrained workshops that can’t accommodate floor-standing models. In my 400 square foot garage that doubles as storage and workshop space, finding room for large equipment is always challenging. The benchtop cabinet fits perfectly on my rolling tool chest when in use, and I can slide it under my workbench for storage.
That said, you’ll need adequate clearance around the cabinet for comfortable operation. I recommend at least 12″ of clearance on all sides, with more space on the front for easy loading and unloading of parts.
Benchtop vs. Floor Models: What’s the Difference?
Beyond the obvious size difference, the key distinctions between the Central Pneumatic benchtop model and larger floor-standing cabinets are:
- Working Capacity: The benchtop unit has an interior working area of approximately 22″ × 15″ × 14″, limiting the size of parts you can work with. Floor models offer substantially larger workspaces for bigger projects.
- Media Capacity: The benchtop model holds about 10 pounds of abrasive media, whereas floor models might hold 50-100 pounds.
- Durability: Floor models typically feature heavier-gauge steel construction and more robust components designed for continuous commercial use.
- Features: Higher-end floor models often include foot pedal operation, more powerful lighting, advanced dust collection, and automatic media recycling systems.
For my needs (and I suspect for most DIY enthusiasts and hobbyists), the benchtop model offers the perfect balance of functionality and practicality. I’ve successfully processed everything from small fasteners to motorcycle wheels, engine components, and even ornamental metal work within its capacity.
Assembly and Setup: Getting Started Right
Unboxing and Initial Assembly
When your cabinet arrives, expect a somewhat substantial box weighing around 65 pounds. I found it easiest to open the packaging right next to where I planned to use it.
Assembly takes about 1-2 hours depending on your experience with similar equipment. The instructions are reasonably clear, but here are some insights I wish I’d known before starting:
- Sort all hardware before beginning – the kit includes several sizes of bolts and washers that look similar but aren’t interchangeable.
- The metal edges can be sharp – wearing gloves during assembly prevents annoying cuts.
- Don’t fully tighten any fasteners until all components are in place – this allows for adjustments to ensure proper alignment.
- The window gasket installation is critical for proper sealing – take your time with this step.
- Testing the glove seals before adding media will save you considerable cleanup if adjustments are needed.
The most challenging aspect of assembly for me was properly aligning the door gasket to ensure a good seal. This takes some patience, but it’s essential for keeping dust contained during operation.
Air Supply Requirements
This is absolutely crucial: your air compressor must be adequately sized for effective operation of the blast cabinet. The Central Pneumatic cabinet performs best with 80-90 PSI and approximately 7-9 CFM (cubic feet per minute) of air flow.
Most small 1-2 HP “pancake” or portable compressors simply cannot maintain sufficient volume for continuous operation. I initially tried using my 2-gallon Porter Cable compressor and found it would run constantly and still couldn’t keep up, resulting in weak, ineffective blasting.
I eventually upgraded to a 26-gallon, 3.7 HP compressor that delivers 11.5 CFM at 90 PSI. This transformed the cabinet’s performance, allowing me to work for extended periods without waiting for pressure to rebuild.
If you already own a compressor, check its specifications. As a general guideline:
- Under 5 CFM: Expect very short blasting intervals with long recovery times
- 5-7 CFM: Adequate for intermittent use with periodic pauses
- 8+ CFM: Smooth, continuous operation for extended periods
Media Selection and Initial Loading
Choosing the right abrasive media dramatically impacts your results. After extensive experimentation, here are my recommendations based on different applications:
- Glass Beads (60-80 grit): My go-to for general cleaning and finishing of aluminum and softer metals. They leave a nice satin finish without removing material.
- Aluminum Oxide (60-120 grit): Excellent for stubborn rust and scale removal on harder metals. This is more aggressive and will remove some base material.
- Silicon Carbide: The most aggressive option, ideal for fast rust removal on heavily corroded steel parts.
- Walnut Shell or Corn Cob Media: Perfect for delicate surfaces or when you need cleaning without altering surface dimensions.
For beginners, I recommend starting with glass beads as they’re versatile and forgiving. Pour approximately 5-8 pounds of media into the cabinet’s bottom (enough to cover the floor about 1/2″ deep). More isn’t necessarily better – excessive media can actually impede the recycling system.
Using the Central Pneumatic Blast Cabinet Effectively
Getting Started: First Operation
Before tackling important projects, take some time to familiarize yourself with the cabinet’s operation. Here’s my standard procedure:
- Ensure proper eye protection is worn (even though you’re looking through the cabinet window).
- Place a simple test piece inside the cabinet.
- Close and latch the door securely.
- Insert your hands into the gloves.
- Turn on the interior light.
- Hold the blasting gun approximately 2-4 inches from your workpiece at a 45-90 degree angle.
- Depress the trigger and begin blasting using smooth, even strokes.
- Practice adjusting your air pressure to see how it affects performance.
You’ll quickly develop a feel for the optimal distance, angle, and pressure for different materials and media types.
Effective Techniques for Different Projects
Over the years, I’ve refined my technique for various applications:
For Rust Removal on Steel Parts:
- Use aluminum oxide at 80-90 PSI
- Hold the nozzle 2-3 inches from the surface
- Move continuously in overlapping patterns
- Focus longer on heavily rusted areas
For Aluminum Parts (Wheels, Engine Components):
- Use glass beads at 60-70 PSI
- Keep the nozzle 3-4 inches from the surface
- Use faster, lighter passes to prevent dimpling
For Glass Etching:
Yes, this cabinet can effectively etch glass! This has become a side hobby of mine, creating custom etched glassware. The technique requires:
- Fine silicon carbide (120-220 grit)
- Lower pressure (40-50 PSI)
- Appropriate stencils or masking
- Quick, light passes to prevent excessive erosion
Using the Cabinet for Automotive Parts
The Central Pneumatic cabinet truly excels with automotive components. I’ve successfully restored:
- Carburetors and intake manifolds
- Valve covers and timing chains
- Brake calipers and suspension components
- Small engine parts
- Wheels (up to 16″ diameter, depending on positioning)
The key advantage is that blasting prepares surfaces perfectly for painting or coating by creating an ideal texture for adhesion. I’ve found that parts cleaned in the cabinet require less prep work and show better paint durability than those cleaned with chemicals or wire brushes.
Maintenance and Troubleshooting: Keeping Your Cabinet Running Smoothly
Regular Maintenance Tasks
Proper maintenance dramatically extends the life of your cabinet. Here’s my routine:
After Each Use:
- Blow off internal components with compressed air
- Clean the viewing window with a soft brush
- Check for and remove any media clogs in the pickup tube or gun
Monthly Maintenance:
- Replace contaminated media (when it becomes dull or contains excessive debris)
- Inspect gloves for wear or tears
- Check and clean the air filter/moisture trap
- Tighten any loose fasteners
- Inspect door seals and replace if damaged
- Clean the light fixture and replace bulbs as needed
Annual Maintenance:
- Completely empty and clean the cabinet interior
- Check all air lines and fittings for leaks
- Inspect the blasting gun nozzle for wear and replace if enlarged
- Apply a light coat of dry lubricant to door hinges and latches
Common Problems and Solutions
Despite its relative simplicity, a few issues commonly arise with this cabinet:
Poor Media Flow or Clogging:
- Problem: The media stream is inconsistent or stops completely
- Solution: Check for moisture in your air supply (install a water separator if needed), ensure the pickup tube isn’t buried too deep in media, and verify the media isn’t contaminated with debris
Excessive Dust Inside Cabinet:
- Problem: Visibility quickly becomes limited during operation
- Solution: Check door seals, replace worn-out gloves, and consider adding a dust collection system (I’ll discuss this modification later)
Insufficient Blasting Power:
- Problem: Media impacts the workpiece but doesn’t effectively clean
- Solution: Verify your air compressor is providing adequate volume (CFM), check for air leaks in supply lines, try more aggressive media, or replace a worn nozzle
Window Becomes Permanently Cloudy:
- Problem: The viewing window becomes etched and unclear
- Solution: Install a sacrificial plastic film on the inside of the window (replaceable when damaged), available at most hardware stores
Replacement Parts and Where to Find Them
The most commonly needed replacement parts are:
- Gloves: Standard size 10″ x 31″ blast cabinet gloves work perfectly. Available at Harbor Freight or online for $15-25 per pair.
- Window Glass: While the original glass is tempered, replacement window kits with proper gaskets cost around $30-40 online.
- Nozzles: Ceramic replacement nozzles (longer lasting than the stock metal one) cost about $10-15 each.
- Media: Best purchased in bulk from industrial supply companies rather than hobby stores. I buy 50lb bags for roughly what 5lbs costs at retail.
While Harbor Freight offers some replacement parts, I’ve found better quality alternatives online from suppliers specializing in blast equipment.
Enhancing Your Central Pneumatic Blast Cabinet: Modifications and Upgrades
After extensive use, I’ve made several modifications that dramatically improved my cabinet’s performance:
Lighting Upgrade
The stock lighting is adequate but not great. I replaced mine with a 12″ LED strip light mounted to the upper interior, providing much brighter, more evenly distributed illumination. This cost about $25 and made a remarkable difference in visibility.
Dust Collection System
Perhaps the most significant improvement was adding a simple dust collection system. I modified the cabinet by:
- Drilling a 2″ hole in the upper back panel
- Installing a dust port connector
- Connecting it to my shop vacuum with a HEPA filter
This keeps the interior much clearer during extended use and reduces the frequency of media replacement.
Pressure Regulator with Gauge
Adding an inline pressure regulator with gauge just before the cabinet input allows precise control over blasting pressure. This is especially helpful when working with delicate parts or switching between different media types.
Foot Pedal Control
For about $30, I added a pneumatic foot pedal that allows hands-free operation of the blasting gun. This seemingly simple addition dramatically improved control and reduced hand fatigue during longer sessions.
Safety Considerations: Protecting Yourself and Others
Essential Safety Precautions
Working with abrasive media under pressure requires attention to safety:
- Respiratory Protection: While the cabinet is designed to contain dust, always wear an N95 mask when handling media or during cabinet maintenance.
- Eye Protection: Wear safety glasses even when looking through the cabinet window, particularly if you need to open the cabinet while traces of dust remain airborne.
- Hearing Protection: The combination of compressor noise and media impact can reach harmful decibel levels. I always wear ear protection during operation.
- Proper Ventilation: Ensure your work area has good air circulation, especially if blasting generates any chemical vapors from coatings being removed.
- Electrical Safety: Keep electrical connections away from areas where media might escape, and use GFCI-protected outlets when operating near potential moisture.
Special Considerations for Different Media Types
Different blasting media present various safety challenges:
- Silica Sand: Avoid entirely due to silicosis risk. Despite being cheap, the health risks aren’t worth it.
- Aluminum Oxide and Silicon Carbide: These create very fine dust – ensure cabinet seals are in excellent condition.
- Glass Beads: Less hazardous but can cause skin irritation with prolonged contact.
- Organic Media (walnut shells, corn cob): May create combustible dust – avoid potential ignition sources.
Where to Buy Your Central Pneumatic Benchtop Blast Cabinet
Primary Retailer: Harbor Freight
Harbor Freight Tools is the primary retailer for Central Pneumatic equipment, including this blast cabinet. They have over 1,000 stores nationwide, and the cabinet is almost always in stock. Their regular price hovers around $229.99, but I’ve seen it on sale for as low as $169.99 during special promotions.
Other Purchase Options
While Harbor Freight is the main source, you can occasionally find these cabinets through:
- Online Marketplaces: Amazon and eBay sometimes carry this model, often with slight premiums over Harbor Freight pricing.
- Used Market: Craigslist, Facebook Marketplace, and local classifieds occasionally have used units at significant discounts. I’ve seen functioning used cabinets for as little as $100.
- Auction Sites: Industrial auctions and estate sales sometimes include these cabinets, often barely used.
Warranty and Support
The Central Pneumatic Benchtop Blast Cabinet comes with a 90-day warranty from Harbor Freight. While this is shorter than many power tools, my experience suggests the cabinet is relatively simple and durable, with most potential issues appearing early in use.
For additional peace of mind, Harbor Freight offers an extended protection plan for around $30 that covers the cabinet for two years. Given the relatively low cost of the unit itself, I skipped this option and haven’t regretted it.
User Experiences and Reviews: What Others Are Saying
I regularly participate in several DIY and restoration forums, and the consensus on this cabinet is generally positive with some common themes:
Positive Feedback Patterns
Most users praise:
- Value for money: Consistently rated as an excellent budget option
- Ease of assembly: Most find the assembly straightforward
- Effectiveness: Performs basic blasting functions well
- Space efficiency: Perfect size for home workshops
One user on a restoration forum summed it up well: “It’s not industrial grade, but for weekend warriors, it’s tough to beat for the price.”
Common Criticisms
The most frequent complaints involve:
- Air consumption: Many underestimate the compressor requirements
- Dust control: Some struggle with excessive dust (often due to poor assembly or worn seals)
- Light quality: The stock lighting leaves room for improvement
- Door seal issues: The door gasket sometimes requires adjustment for proper sealing
My Balanced Assessment
After extensive use, I believe the Central Pneumatic cabinet represents an excellent value with some understandable limitations. It’s precisely what it claims to be – an affordable entry into media blasting for hobbyists and DIY enthusiasts.
Professional shops would quickly outgrow its capabilities, but for weekend projects and restorations, it’s remarkably capable when paired with an adequate compressor and appropriate media.
Final Thoughts: Is This the Right Cabinet for You?
After three years of regular use, I can confidently say the Central Pneumatic Benchtop Blast Cabinet has been one of my most valuable workshop investments. It’s transformed how I approach restoration projects, saved me considerable money on outsourced services, and allowed me to achieve results I simply couldn’t attain with other methods.
Ideal For:
- Home workshop enthusiasts with limited space
- DIY automotive restoration projects
- Hobbyists working with metal, glass, or wood
- Anyone looking to clean or prepare surfaces for painting/coating
- Those with an adequate air compressor (or willingness to upgrade)
Perhaps Not For:
- Professional shops requiring continuous heavy-duty use
- Those working primarily with very large parts beyond its capacity
- Individuals without access to an adequate air compressor
If you’re like me – passionate about quality results but working within the constraints of a home workshop – the Central Pneumatic Benchtop Blast Cabinet offers remarkable capability at an accessible price point. Paired with the right media and air supply, it can deliver professional-grade results while fitting neatly into your workspace and budget.
What began as a tentative purchase has become an indispensable tool in my workshop. Whether I’m restoring vintage motorcycle parts, prepping automotive components, or exploring creative glass etching projects, this versatile cabinet continues to exceed my expectations and expand the range of projects I can confidently tackle.
Have you added a blast cabinet to your workshop? I’d love to hear about your experiences and any clever modifications you’ve discovered!