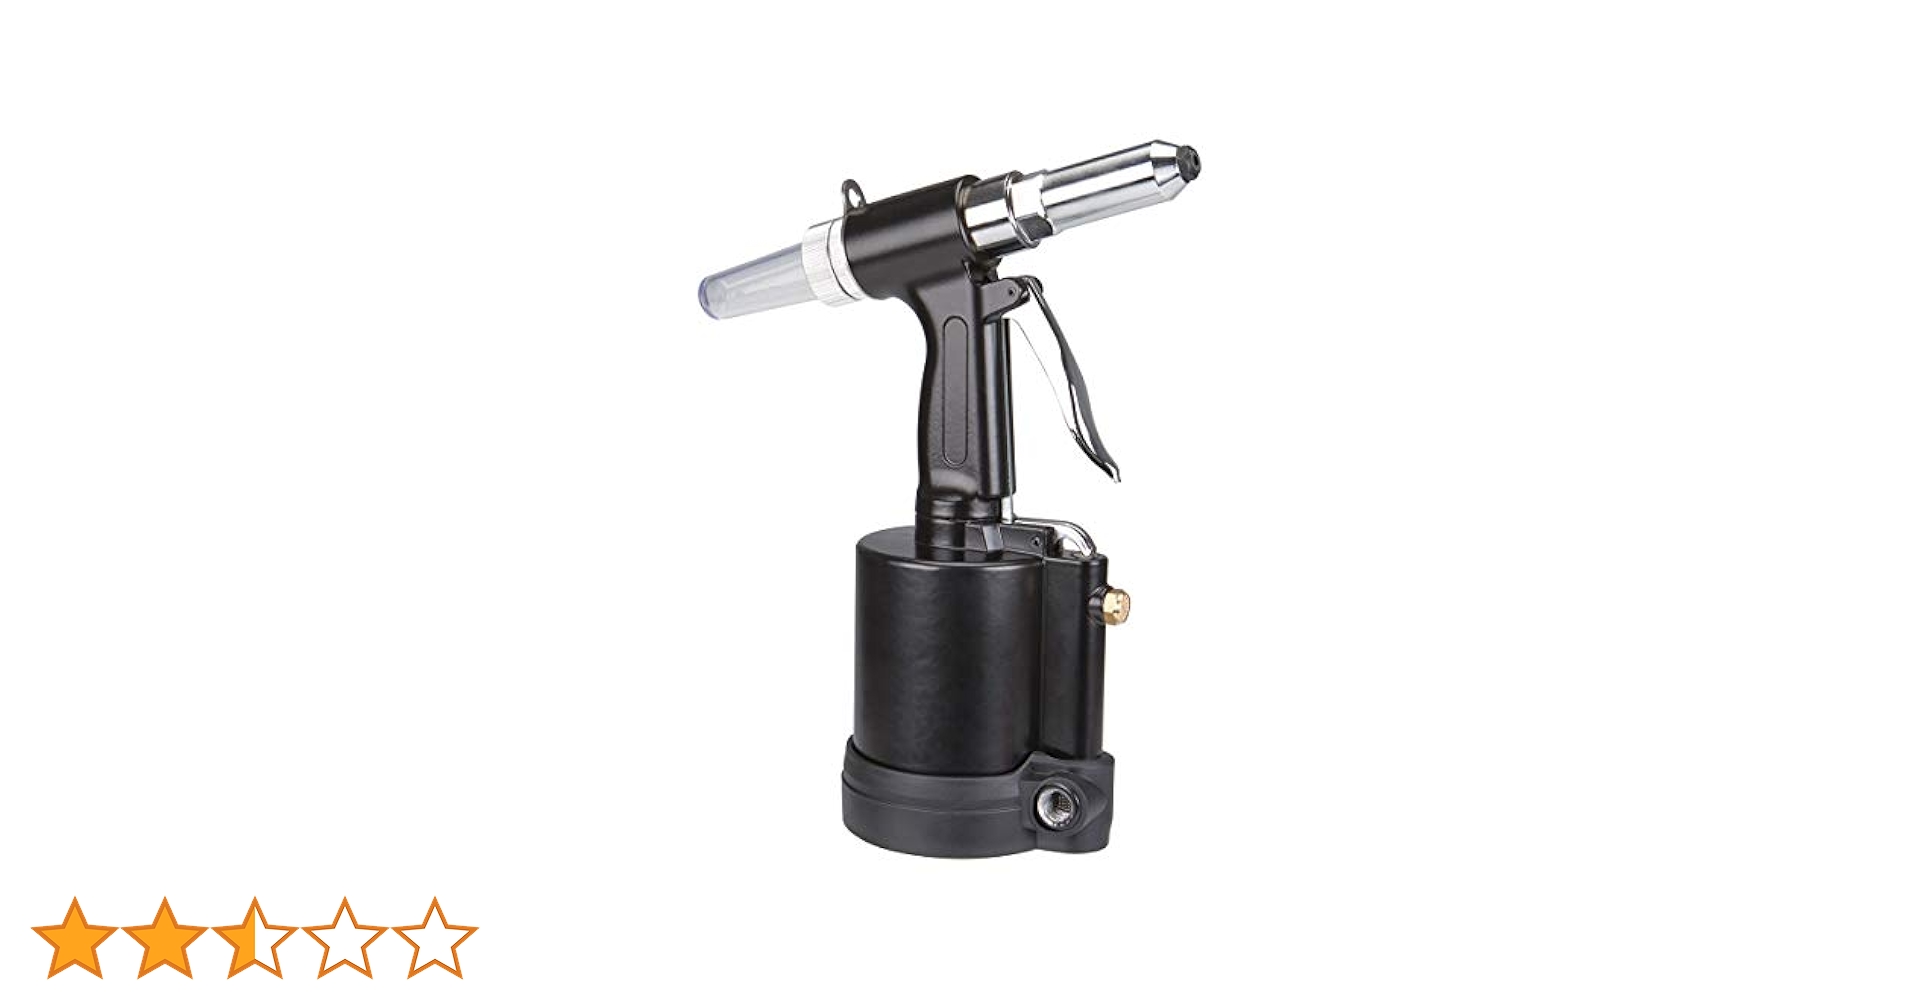

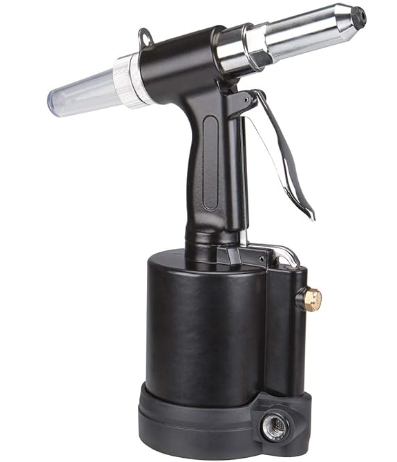
Central Pneumatic 1/4 in. Air Hydraulic Riveter Interchangeable Nosepieces Rivets: 1/4 in, 3/16 in, 5/32 in, 1/8 in.
- Manufacturer
Central Pneumatic
Brand
Central Pneumatic
Is Discontinued By Manufacturer
No
Manufacturer Part Number
4512
$98.89
After spending countless hours hunched over manual rivet tools, my aching hands finally convinced me it was time for an upgrade. The decision to invest in a pneumatic rivet gun changed my DIY and repair game dramatically, and the Central Pneumatic model quickly became my workshop MVP. Whether you’re considering your first rivet gun purchase or looking to upgrade, I’m sharing everything I’ve learned about this affordable workhorse that deserves a spot in your tool arsenal.
My Journey with the Central Pneumatic Rivet Gun
The first time I pulled the trigger on my Central Pneumatic Rivet Gun, I couldn’t believe the difference. What previously took effort and time became effortless and quick. That’s when I realized that choosing the right pneumatic rivet gun can transform your entire approach to fabrication and repair work.
I remember thinking, “Why did I wait so long to make this purchase?” As someone who regularly works on automotive projects, home repairs, and the occasional metal fabrication, I’ve put this tool through its paces. After two years of consistent use, I’m sharing my unfiltered experience to help you decide if this is the right tool for your needs.
How Does the Central Pneumatic Rivet Gun Actually Work?
Understanding how this tool works helps you appreciate its efficiency. The Central Pneumatic Rivet Gun operates using compressed air power to drive rivets with minimal effort from you. Here’s the simplified breakdown:
The tool works on a pneumatic principle that harnesses compressed air to generate force. When you pull the trigger, compressed air flows through the tool, creating pressure that drives the internal mechanism forward. This mechanism grips the mandrel (stem) of the rivet and pulls it with significant force, causing the rivet to deform and create a secure fastening.
What impressed me most was how the hydraulic-pneumatic mechanism multiplies the force, allowing you to set rivets that would require significant hand strength with manual tools. The internal components are smartly designed with hardened steel that can withstand thousands of operations without failing.
When you connect the gun to your air compressor and pull the trigger, you’ll feel a smooth, controlled action as the rivet is set. The spent mandrel is then collected in the rear collection bottle (a feature I particularly appreciate for keeping my workspace clean).
The beauty of this system is its simplicity – there’s very little that can go wrong, which is why these tools are known for their longevity. The pneumatic action means consistent results every time, unlike manual rivet guns where your grip strength might vary throughout a long project.
Price Point: Is the Central Pneumatic Rivet Gun Worth the Investment?
Let’s talk money – because that’s often the deciding factor for many of us. The Central Pneumatic Rivet Gun typically retails between $19.99 and $29.99, depending on sales and promotions. This price point is what initially caught my attention, especially since comparable models from other brands often cost $50-$100 or more.
I was initially skeptical about the low price. Would it hold up to regular use? Would I regret not spending more on a “professional” brand? After two years of regular use, I can confidently say this tool offers exceptional value.
For perspective, I calculated that the tool paid for itself within the first two major projects. When I factor in the time saved and the quality of work I’m able to produce, the Central Pneumatic Rivet Gun has been one of my most cost-effective tool purchases.
The price becomes even more attractive when you consider that replacement parts are readily available and affordable. I’ve only needed to replace the nose pieces once after heavy use, and they cost under $10 for a set.
Where to Purchase Your Central Pneumatic Rivet Gun
Finding this tool is straightforward, though availability may vary depending on your location. Harbor Freight Tools is the primary retailer for Central Pneumatic tools, and you’ll find the rivet gun in most of their brick-and-mortar stores.
I purchased mine during one of their weekend sales, which brought the price down to $19.99 with a coupon (a tip worth remembering – Harbor Freight frequently offers coupons that can save you 20% or more).
If you prefer online shopping, the Central Pneumatic Rivet Gun is available on Harbor Freight’s website and occasionally through third-party sellers on Amazon and eBay. However, I recommend purchasing directly from Harbor Freight when possible to ensure you’re getting a genuine product with warranty coverage.
One shopping strategy I’ve found helpful is to check Harbor Freight’s monthly flyer or sign up for their email list to catch sales. The tool occasionally goes on clearance or special promotion, especially around major holidays.
Professional Use: Can the Central Pneumatic Stand Up to Daily Work?
This is where opinions tend to diverge. Some professionals swear by higher-end brands like Astro Pneumatic or Chicago Pneumatic for daily, heavy-duty use. However, after speaking with several contractor friends and based on my own semi-professional use, the Central Pneumatic model holds its own remarkably well for most applications.
I’ve used mine for approximately 15-20 hours per week during busy periods, setting hundreds of rivets in various materials. While it lacks some of the refinements of the $100+ models, the core functionality remains solid.
Here’s my honest assessment for professional use:
For light to medium professional work (up to several hundred rivets per week), the Central Pneumatic performs admirably. The tool handles standard riveting tasks without complaint, though you might notice it runs slightly hotter than premium models during extended use.
For heavy industrial use or production environments where you’re setting thousands of rivets daily, you might want to consider a higher-end model with better heat dissipation and more durable internal components.
One contractor I know keeps several Central Pneumatic guns as backups to his premium rivet gun. His logic? “For the price of one high-end gun, I can have four of these. If one fails during a job, I just grab another and keep working.”
The Verdict from Users: Central Pneumatic Rivet Gun Reviews
I’ve scoured forums, talked with fellow tool enthusiasts, and compiled reviews from multiple sources to provide a comprehensive picture of user experiences.
The overall consensus lands at approximately 4.2/5 stars across various platforms. Most users cite the excellent value proposition as the primary advantage, with reliability coming in as a close second.
Common praise points include:
- Excellent power-to-weight ratio
- Comfortable grip during extended use
- Consistent performance across various rivet sizes
- Durable construction that withstands workshop abuse
- Easy maintenance and affordable replacement parts
The criticism typically centers around:
- The collection bottle occasionally coming loose during heavy use
- Slightly heavier than premium models
- Some users report minor air leaks developing after extended use
- Limited availability of factory parts in some regions
My experience aligns with the majority of positive reviews. While I’ve encountered minor issues (like needing to occasionally tighten the collection bottle), none have impacted my workflow significantly. For a tool in this price range, the performance consistently exceeds expectations.
First-Time User Guide: Getting Started with Your Central Pneumatic Rivet Gun
Remember my first time using the rivet gun? I was both excited and slightly intimidated. If you’re new to pneumatic tools, here’s my step-by-step guide to get you comfortable with your new purchase:
Setting Up Your Central Pneumatic Rivet Gun
- Unbox and inspect your tool: Check for any shipping damage and ensure all parts are included (the gun, collection bottle, and nose pieces).
- Select the appropriate nose piece: The gun comes with multiple nose pieces for different rivet sizes. Choose the one that matches your rivet diameter and thread it onto the front of the gun.
- Connect your air supply: Attach your air hose to the 1/4″ NPT air inlet at the bottom of the handle. Make sure your air compressor is set to deliver between 90-100 PSI.
- Test the operation: Before loading rivets, pull the trigger a few times to ensure air flows properly through the tool and the mechanism moves smoothly.
- Load a rivet: Insert the rivet stem into the appropriate nose piece, making sure it’s fully seated.
- Position and fire: Place the rivet in your workpiece and squeeze the trigger firmly until the rivet sets and the mandrel breaks.
My first few rivets took some getting used to, but within 10 minutes, I was working confidently. The learning curve is minimal, which is another advantage of this tool.
Compatibility: What Rivet Sizes Can You Use?
One of the most frequent questions I receive is about rivet compatibility. The Central Pneumatic Rivet Gun comes with four nose pieces designed to accommodate the most common rivet sizes:
- 3/32″ (2.4mm)
- 1/8″ (3.2mm)
- 5/32″ (4.0mm)
- 3/16″ (4.8mm)
This range covers approximately 90% of the rivets you’ll encounter in everyday projects. I primarily use 1/8″ and 3/16″ rivets for automotive work and general fabrication, and the gun handles them with equal ease.
The tool is designed to work with standard blind rivets (also called “pop rivets”) made from aluminum, steel, and stainless steel. In my experience, it handles aluminum rivets with minimal effort and still performs well with steel rivets, though you’ll notice the increased resistance.
One compatibility note: While the gun can physically accept structural rivets (like those with a 1/4″ diameter), it may not develop sufficient force to set them properly. For structural applications requiring larger rivets, you might need a heavier-duty rivet gun.
Maintaining Your Central Pneumatic Rivet Gun for Longevity
Tool maintenance isn’t exciting, but it’s crucial for longevity. The good news is that the Central Pneumatic Rivet Gun requires minimal upkeep compared to many other workshop tools. Here’s my maintenance routine that has kept mine running smoothly for years:
Regular Maintenance Tasks
- Daily/After Use: Empty the mandrel collection bottle and clear any jammed mandrels from the mechanism. A quick blast of compressed air through the tool helps remove any metal debris.
- Weekly (with heavy use): Apply 2-3 drops of pneumatic tool oil to the air inlet. This keeps the internal components lubricated and prevents corrosion. Cycle the tool a few times to distribute the oil.
- Monthly: Check and tighten all external screws and fittings. Inspect the nose pieces for wear and replace if necessary. Clean the mandrel pathway with a small brush.
- Quarterly: Disassemble the nose assembly and clean thoroughly. Check the jaws for signs of wear or damage.
Following this simple maintenance schedule has kept my rivet gun in excellent condition despite regular use. I’ve only needed to replace wear parts once in two years, which speaks to the tool’s durability when properly maintained.
Air Pressure Requirements: Getting the Most from Your Compressor
The Central Pneumatic Rivet Gun operates optimally between 90-100 PSI, with an air consumption rate of approximately 4 CFM (cubic feet per minute) during operation. This is within the capability of most workshop compressors.
I’ve found that maintaining consistent pressure is more important than hitting the maximum PSI. A steady 90 PSI produces better results than fluctuating between 70-110 PSI as your compressor cycles.
For small projects, even a 2-gallon portable compressor can drive the rivet gun effectively, though you may need to pause occasionally to let the compressor catch up. For continuous use, I recommend at least a 6-gallon compressor with a recovery rate of 4+ CFM.
One pressure-related tip: If you’re working with larger rivets (5/32″ or 3/16″), setting your compressor closer to 100 PSI provides the extra force needed for clean, consistent setting. For smaller aluminum rivets, 85-90 PSI works perfectly and produces less noise.
Automotive Applications: A Perfect Match for Vehicle Work
As someone who regularly works on vehicle projects, I’ve found the Central Pneumatic Rivet Gun to be ideally suited for automotive applications. The slim profile allows access to tight spaces, and the power is sufficient for automotive-grade rivets.
Common automotive applications where I’ve used the gun include:
- Body panel repairs and fabrication
- Installing interior panels and trim
- Attaching heat shields and splash guards
- Mounting brackets and accessories
- Repairing exhaust heat shields
- Setting blind rivets in frame rails
The quick operation and one-handed use make automotive work much easier, especially when you’re in awkward positions under a vehicle or reaching into engine compartments.
One automotive-specific tip: When working around sensitive components like wiring harnesses or fuel lines, the mandrel collection bottle becomes extremely valuable. It prevents broken mandrels from falling into critical areas where they could cause damage.
Technical Specifications: The Numbers That Matter
For the technically minded, here are the exact specifications of the Central Pneumatic Rivet Gun:
- Operating Pressure: 90-100 PSI
- Air Consumption: 4 CFM @ 90 PSI
- Air Inlet: 1/4″ NPT
- Rivet Capacity: 3/32″, 1/8″, 5/32″, 3/16″ (aluminum, steel, stainless steel)
- Pull Force: Approximately 2,300 lbs (10.2 kN)
- Stroke Length: 0.63″ (16mm)
- Overall Length: 10.5″ (267mm)
- Weight: 3.3 lbs (1.5 kg)
- Noise Level: Approximately 85 dB(A)
- Collection Bottle Capacity: Approximately 150 mandrels (varies by size)
These specifications put the Central Pneumatic firmly in the mid-range category for pneumatic rivet guns, despite its budget-friendly price point. The pull force is particularly impressive, allowing it to handle most standard riveting tasks with ease.
Troubleshooting Common Issues with the Central Pneumatic Rivet Gun
Even the best tools occasionally misbehave. During my time with the Central Pneumatic Rivet Gun, I’ve encountered a few issues and developed quick solutions:
Problem: Gun cycles but doesn’t pull rivets completely
Solution: Check your air pressure first – it should be at least 90 PSI. Next, inspect the jaws for wear or debris. Clean the jaw mechanism and apply a drop of oil. If problems persist, the jaws may need replacement.
Problem: Air leaking from the trigger or handle
Solution: Apply PTFE tape to the air inlet connection. If leaking continues, disassemble the handle (four screws) and check the O-rings on the air valve. Replace if damaged, or apply a small amount of pneumatic grease.
Problem: Mandrels jamming in the mechanism
Solution: This usually happens when the collection bottle is full or not properly attached. Empty the bottle and ensure it’s securely fastened. Also check that you’re using the correct nose piece for your rivet size.
Problem: Inconsistent rivet setting
Solution: This is typically caused by fluctuating air pressure or worn jaws. Stabilize your air supply and inspect the jaws. Also check that the nose piece is tightly secured, as a loose nose piece can cause inconsistent results.
In the rare case of serious mechanical failure, replacement parts are available, though sometimes finding specific internal components can be challenging. For major repairs, Harbor Freight’s warranty service is often the most practical solution.
Common Problems and Their Solutions
Based on user reports and my own experience, these are the most frequent issues people encounter with the Central Pneumatic Rivet Gun:
1. Mandrel Collection Bottle Issues
The collection bottle can sometimes work loose during operation. I solved this by applying a small piece of electrical tape around the threads, which provides just enough additional friction to keep it secure.
2. Air Leaks After Extended Use
Some users report developing air leaks after several months of use. This typically occurs around the trigger valve or air inlet. Replacing the O-rings (standard sizes available at hardware stores) usually resolves this issue.
3. Difficulty with Larger Rivets
When setting 3/16″ steel rivets, some users find the gun struggles. Ensuring maximum air pressure (100 PSI) and properly maintaining the jaw mechanism significantly improves performance with larger rivets.
4. Weight Fatigue During Extended Use
At 3.3 lbs, the Central Pneumatic is slightly heavier than some premium models. For long sessions, I’ve found that using a tool balancer or supporting my arm on a workbench reduces fatigue.
5. Nose Piece Wear
The nose pieces will eventually wear, especially when used with steel rivets. I keep a spare set on hand and replace them at the first sign of difficulty setting rivets.
None of these issues are deal-breakers, and all have straightforward solutions. Considering the price point, these minor quirks are acceptable tradeoffs for an otherwise reliable tool.
Assembly and Setup: Getting Ready for Your First Project
When you first receive your Central Pneumatic Rivet Gun, proper assembly ensures optimal performance. Here’s my detailed assembly process:
- Attach the mandrel collection bottle: Screw the clear plastic bottle into the rear of the gun. Hand-tighten only – overtightening can crack the plastic.
- Select and install the appropriate nose piece: Choose the nose piece that matches your rivet diameter. Unscrew the nose cap, insert the correct nose piece, and securely reattach the nose cap.
- Connect the air supply: Apply PTFE tape to the threads of your quick-connect fitting (usually not included), then thread it into the air inlet at the base of the handle.
- Set up your air compressor: Ensure your compressor is set to deliver 90-100 PSI. If your compressor has a regulator, adjust it to this range.
- Test operation: Before beginning your project, test the gun operation by cycling it several times without a rivet. The mechanism should move smoothly and return to position.
The entire setup process takes about 5 minutes, and once completed, you’re ready to begin riveting. One setup tip: If possible, use a moisture trap on your air line to prevent water from entering the tool, especially in humid environments.
Warranty Information: What’s Covered and for How Long
The Central Pneumatic Rivet Gun typically comes with a 90-day warranty when purchased from Harbor Freight. This covers manufacturing defects but not wear and tear from normal use.
For longer protection, Harbor Freight offers an extended warranty program called “Extended Service Protection” that can be purchased at the time of sale. This extends coverage to 1 or 2 years, depending on the plan selected.
In my experience, Harbor Freight honors their warranty without hassle if you encounter a genuine defect. I recommend keeping your receipt and the original packaging until you’ve thoroughly tested the tool.
If you do need to make a warranty claim, the process is straightforward:
- Return to the store with your receipt and the tool in its original packaging
- Explain the defect or malfunction
- They will typically offer a replacement on the spot or process a return
One warranty consideration: modifications to the tool or using it beyond its stated capabilities will void the warranty. Stick to the recommended rivet sizes and operating pressures to maintain coverage.
Working with Aluminum Rivets: The Perfect Pairing
The Central Pneumatic Rivet Gun truly shines when working with aluminum rivets. The relatively soft nature of aluminum means less resistance during setting, resulting in smooth, consistent results even during extended use.
I’ve set thousands of aluminum rivets with this gun, from tiny 3/32″ rivets on delicate sheet metal to 3/16″ rivets on thicker aluminum components. The tool handles them all with impressive consistency.
For aluminum riveting projects, I’ve found that operating at slightly lower pressure (85-90 PSI) provides the best results. This reduces the chance of distorting thin materials while still providing sufficient force to properly set the rivet.
One technique tip for aluminum rivets: Use a slightly slower, more controlled trigger pull. This allows the rivet to form more gradually, creating a better-looking finish, especially on visible surfaces.
Brand Comparison: How Does Central Pneumatic Stack Up Against Competitors?
I’ve had the opportunity to use several different pneumatic rivet guns, from budget models to professional-grade tools. Here’s how the Central Pneumatic compares to other common brands:
vs. Harbor Freight’s Earthquake XT
The Earthquake XT (Harbor Freight’s premium line) offers marginally better build quality and slightly reduced vibration, but at nearly twice the price. Performance difference is minimal for most applications.
vs. Astro Pneumatic
Astro’s models (typically $80-120) feature better ergonomics and slightly more consistent operation with larger rivets. However, for standard rivet sizes, the performance gap doesn’t justify the significant price difference.
vs. Chicago Pneumatic
Chicago Pneumatic offers professional-grade tools at $150-300. They’re lighter, more refined, and built for all-day industrial use. However, for periodic or even regular non-production use, the Central Pneumatic delivers 80% of the performance at 15-20% of the price.
vs. Manual Rivet Guns
Compared to manual options, there’s simply no contest for projects requiring more than a handful of rivets. The speed, consistency, and reduced hand fatigue make the Central Pneumatic an obvious choice over manual alternatives.
In my workshop, the Central Pneumatic handles 95% of my riveting needs perfectly. On rare occasions where I need to set structural rivets or work with specialized materials, I might borrow a higher-end tool, but these instances are infrequent enough that they don’t justify the additional investment for most users.
Replacing Parts: Keeping Your Tool in Top Condition
Eventually, all tools require replacement parts. For the Central Pneumatic Rivet Gun, the most commonly replaced components are:
- Nose Pieces: These wear gradually with use, especially when setting steel rivets. Replacement sets are available from Harbor Freight for approximately $8-10.
- Jaw Sets: After extensive use (thousands of rivets), the jaws may wear and lose gripping power. Replacement jaws cost around $12-15.
- O-rings and Seals: If air leaks develop, replacement O-ring sets can be purchased for under $5 at most hardware stores.
- Collection Bottle: These occasionally crack or cross-thread. Replacements cost approximately $5.
- Return Spring: This rarely fails but is available if needed for about $7.
To replace most parts, basic hand tools are sufficient. The design is straightforward, making repairs accessible even to those with limited mechanical experience. I’ve replaced my nose pieces and jaw set once in two years of regular use, a maintenance cost of less than $25 total.
For parts not available directly from Harbor Freight, aftermarket suppliers and online marketplaces often carry compatible components. In some cases, parts from higher-end rivet guns can be modified to fit with minor adjustments.
Safety First: Using Your Rivet Gun Without Incident
While the Central Pneumatic Rivet Gun is relatively safe compared to many power tools, proper safety precautions are still essential:
Essential Safety Practices
- Always wear eye protection: Broken mandrels can become projectiles if the collection bottle isn’t properly attached.
- Wear hearing protection: While not as loud as some pneumatic tools, the repeated popping sound can damage hearing over time.
- Keep hands clear of the work area: The force exerted during riveting can cause pinch points.
- Disconnect air when not in use: Always disconnect the air supply when changing nose pieces or performing maintenance.
- Secure workpieces properly: Inadequately secured materials can shift unexpectedly during riveting.
- Check for proper rivet positioning: Improperly positioned rivets can fail catastrophically under load.
- Be aware of the opposite side: Always know what’s on the other side of your workpiece before setting a rivet.
I learned several of these lessons the hard way, including having a mandrel ricochet off a metal surface (thankfully my safety glasses prevented any injury). Take the time to work safely – the few extra seconds are well worth avoiding an injury.
Cleaning and Storage: Extending Tool Life
Proper cleaning and storage significantly extend the life of your Central Pneumatic Rivet Gun. Here’s my end-of-project routine:
Cleaning Process
- Disconnect the air supply and remove any loaded rivets.
- Empty the collection bottle and clean out any debris.
- Use compressed air to blow out the nose assembly and internal pathways. Direct the air from both the front and rear of the tool.
- Wipe down the exterior with a lightly oiled cloth to prevent rust, especially if you work in humid conditions.
- Apply 2-3 drops of pneumatic tool oil to the air inlet, then briefly connect the air supply and cycle the tool to distribute the oil.
Storage Best Practices
- Store in a cool, dry location away from extreme temperatures and humidity.
- Use the original case if available, or wrap in a cloth to protect from dust and impacts.
- Leave the collection bottle attached but emptied to protect the internal mechanism.
- Store with a nose piece installed to prevent debris from entering the mechanism.
- If storing for extended periods (several months), apply a slightly heavier coat of protective oil.
Following these cleaning and storage practices has kept my tool in excellent condition despite a dusty workshop environment. The few minutes of care after each use pay dividends in reliability and longevity.
Conclusion: Is the Central Pneumatic Rivet Gun Right for You?
After two years and thousands of rivets, I can confidently recommend the Central Pneumatic Rivet Gun for most users. It occupies a sweet spot between price and performance that’s hard to beat.
For DIY enthusiasts, hobbyists, and even light professional use, this affordable pneumatic rivet gun delivers exceptional value and reliable performance. The limitations it does have (slightly heavier build, occasional need for part replacements) are minor compared to the significant cost savings over premium brands.
If you’ve been struggling with a manual rivet gun or putting off projects that require extensive riveting, the Central Pneumatic model represents an accessible entry point into pneumatic riveting. The productivity gains and reduced physical strain make it well worth the modest investment.
Remember that proper setup, maintenance, and storage are key to getting the most from this tool. Treat it well, and it will serve you reliably for years, as it has for me.
Whether you’re tackling automotive repairs, home improvement projects, or metal fabrication, this humble tool might just become one of your workshop favorites. It certainly has earned its place in mine.